Factory Actions
The Factory Actions page is used to enable the interface between the Ayla platform and the OEM manufacturing process.
Ayla customers can use Factory Actions to request a block of DSNs to initiate the manufacturing process. This is then written into OEM devices and other device data will be extracted from the OEM devices during the manufacturing and provisioning processes based upon scripts provided by Ayla Professional Services.
Notice that there are two tabs on this page:

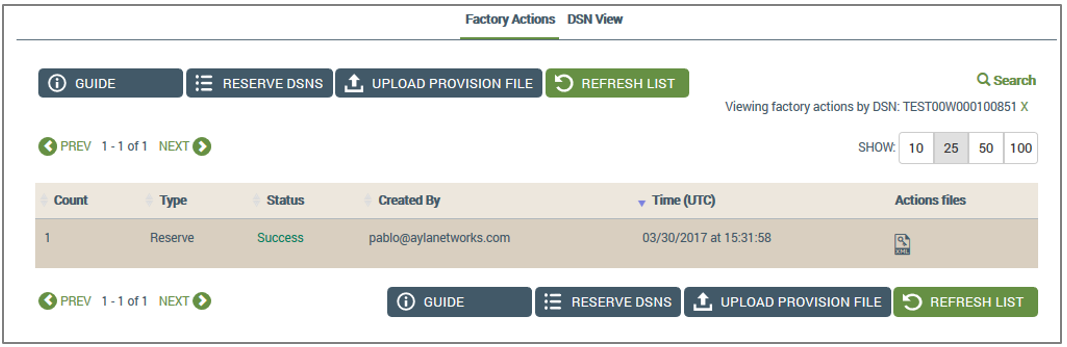
The Factory Actions tab displays by default and lists of all the factory actions. The following details are provided for each:
- Count - the number of devices that were included in the action
- Type - the type of action:
- Validate
- Provision
- Reserve
- Status - the result of the action: Success, Failure
- Created By - the email of the user who initiated the factory action
- Time (UTC) - the date/time that the factory action was started
- Action files - three files providing details on the reserved set of DSNs for this factory action
The OEM type and user role configured in the Ayla platform determines your access to operations and module availability in Factory Actions. The OEM Types are set by Ayla Professional Services for each Ayla customer; click here for definitions of the OEM types. The User Roles are set by users assigned the OEM admin role; click here for a complete explanation of user roles in the Ayla platform.
You can accomplish the following for Factory Actions:
- Click the search icon in the upper right corner of the page to open the Search Factory Actions dialog box:

- Complete the fields as follows:
- For Action Type, click one of the following options from the drop-down list:
- Reserve
- Manufacture or Provision (depends on your assigned user role)
- Validate
- For Status, click the status of the factory action in the drop-down list:
- Success
- Failure
- For Created By, enter the email of the user who initiated the factory action.
- For Start Time From, click the start date in the pop-up calendar.
- For Start Time To, click the end date in the pop-up calendar.
- Click SEARCH.
- Click the Factory Action you wish to view. This displays a list of all the devices that are part of the Factory Action on the DSN View tab:

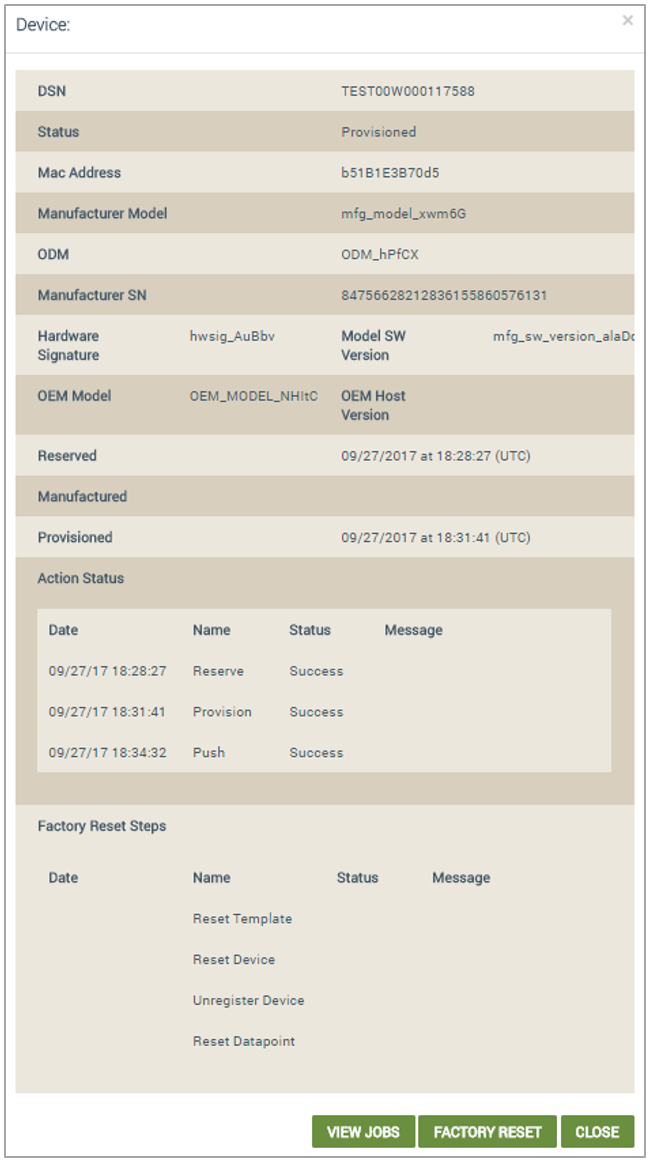
- Click the DSN of the device you wish to view. This displays the Device dialog box, which provides data on the Factory Action for that device:

- Click the VIEW JOBS button to display the details of the Factory Action jobs for this device:

The reservation process depends on the type of device being manufactured: Ayla Wi-Fi Production Module (formerly called Black Box) or Ayla Integrated Agent (formerly called White Box). The Ayla Wi-Fi Production Module uses an Ayla module chosen by the manufacturing customer. The Ayla Integrated Agent uses a Linux distribution of the customer’s choice.
- Click the RESERVE DSNS button to open the Reserve Devices dialog box:
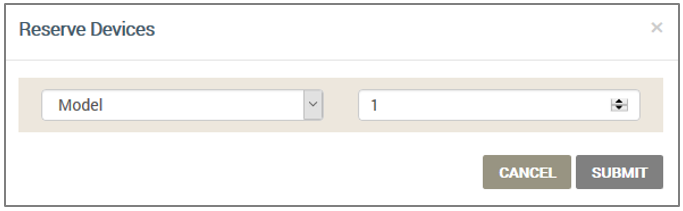
- For Model, click the model in the drop-down list.
- Enter or use the up-down arrows to select the quantity to reserve.
- Click the SUBMIT button to generate the following for each device:
- Device Serial Number (DSN)
- Private/public key pair (authenticates device with cloud service)
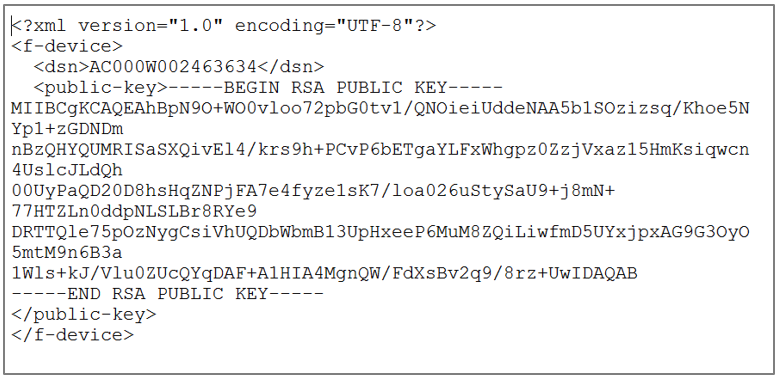
When the job is completed, a success banner displays on the user interface. The completed job results in an encrypted XML file available for download from the Factory Action tab under the Factory Action column for the corresponding device.

Three action files are created during the reservation process:
- CSV file - which is imported during the “Upload Manufacture” or “Upload Provision” function. The file contains a list of the DSNs recently uploaded.
- LOG file - which contains errors that occurred during the “Upload Manufacture” or “Upload Provision” function.
- XML file (zipped) - which contains the encrypted XML details of a reserved set of DSNs (example shown below).
Download the file as follows:
- Click the file icon for Action files.
- Move the file to a location on your computer.
The manufacture file has the following attributes:
- Version - the version of the log message format
- Time - the UTC time in seconds since 1 Jan, 1970
- Timestamp - the human-readable form of the time
- Status - status of action performed
- Err_code - whether configuration successfully loaded onto gateway
- Model - the model number of Ayla module
- DSN - the customer’s Device Serial Number
- MAC - unique hardware ID for device (usually set by manufacturer)
- mfg_sn - the hardware manufacturer’s model ID
- hwsig - the globally unique hardware identifier
- comment - the descriptive comment - must not contain commas
The upload process for the manufacturing file is as follows:
- Click the UPLOAD MANUFACTURE FILE button.
- Click the Browse button to locate and select the file.
- Click the VALIDATE button, which checks the file to ensure correct information and formatting.
- If there are errors found, click the log file to review it and then correct the upload file.
- After validating, click SUBMIT.
|
NOTE |
You can click SUBMIT without taking validation step. However, any DSNs with errors will not be uploaded to the Ayla platform, and the errors are included in the log file that posts under the Actions column. The DSN entries in the upload file that caused the error can be corrected and uploaded. A successful DSN entry should be removed or they will receive errors as duplicates. |
The provision file is available to all customers, except module manufacturers. The file has the following attributes:
- Version - the version of the log message format
- Time - the UTC time in seconds since 1 Jan, 1970
- Timestamp - the human-readable form of the time
- Status - status of action performed
- Err_code - whether configuration successfully loaded onto gateway
- Model - the model number of Ayla module
- DSN - the customer’s Device Serial Number
- MAC - unique hardware ID for device (usually set by manufacturer)
- mfg_sn - the hardware manufacturer’s model ID
- hwsig - the globally unique hardware identifier
- comment - the descriptive comment - must not contain commas
- OEM ID - Ayla’s ID for the Ayla customer
- OEM Model - Ayla’s ID for Product Model
- module_sw_version - the module software version
- oem_host_version - OEM image version
The upload process for the provisioning file is as follows:
- Click the UPLOAD PROVISION FILE button.
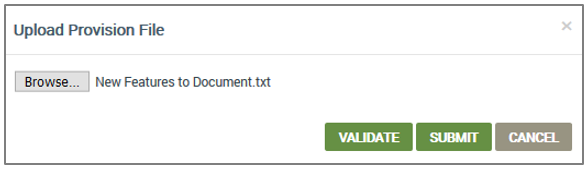
- Click the Browse button to locate and select the file.
- Click the VALIDATE button, which checks the file to ensure correct information and formatting.
- If there are errors found, click the log file to review it and then correct the upload file.
- After validating, click SUBMIT.
|
NOTE |
You can click SUBMIT without taking validation step. However, any DSNs with errors will not be uploaded to the Ayla platform, and the errors are included in the log file that posts under the Actions column. The DSN entries in the upload file that caused the error can be corrected and uploaded. A successful DSN entry should be removed or they will receive errors as duplicates. |
- Click the DSN View tab.
- Click the search icon in the upper right corner of the page to open the Search dialog box:
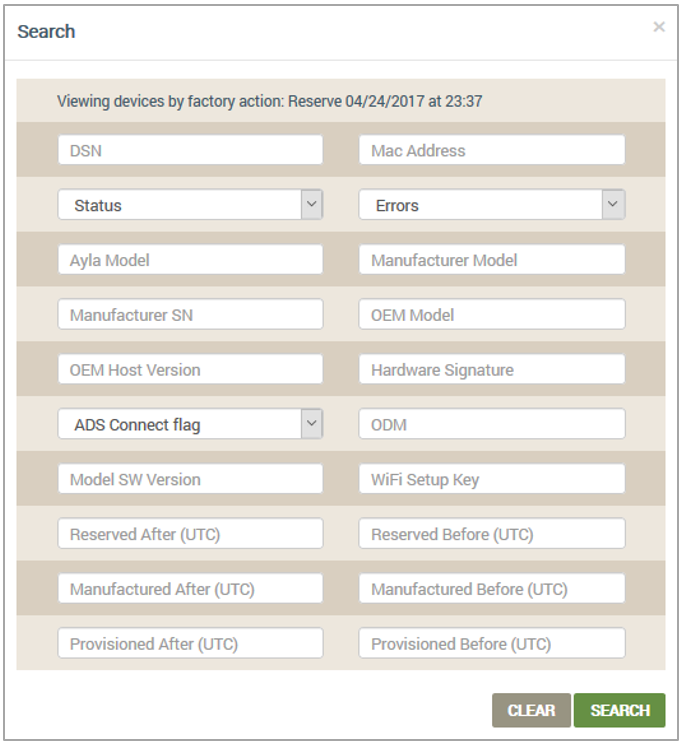
- Complete the fields as follows:
- For DSN, enter the customer’s Device Serial Number; you can use wildcards.
- For Mac Address, enter the IP MAC address.
- For Status, which is the DSN status, click one of the following options from the drop-down list:
- Reserved
- Manufactured
- Provisioned
- For Errors, which is the type of response, click the status of the factory action in the drop-down list:
- Success
- Failure
- For Ayla Model, enter the model number of Ayla module.
- For Manufacturer Model, enter the manufacturer model name.
- For Manufacturer SN, enter the manufacturer serial number.
- For OEM Model, enter the model number of the customer’s host application board.
- For OEM Host Version, enter the customer's host version number.
- For Hardware Signature - enter the hardware identification.
- For ADS Connect flag, click the flag in the drop-down list to show the device's connection with the Ayla Device Service (ADS):
- Yes (connected)
- No (not connected)
- For ODM, enter the original device manufacturer.
- For Model SW Version, enter the software version of the model.
- For WiFi Setup Key, enter the setup key for Wi-Fi; you can use wildcards.
- For Reserved After (UTC), enter the reserved after date/time in the pop-up calendar.
- For Reserved Before (UTC), enter the reserved before date/time in the pop-up calendar.
- For Manufactured After (UTC), enter the manufactured after date/time in the pop-up calendar.
- For Manufactured Before (UTC), enter the manufactured before date/time in the pop-up calendar.
- For Provisioned After (UTC), enter the provisioned after date/time in the pop-up calendar.
- For Provisioned Before (UTC), enter the provisioned before date/time in the pop-up calendar.
- Click SEARCH.
- In the DNS View tab, click the device to open the Device dialog box:
- To review the jobs for this device, click the VIEW JOBS button.
- The Factory Actions tab shows a list of jobs for the device.
- DSN View tab shows related device serial numbers (DSNs). You can click the DSN to open the Device dialog box showing just this device:
- In the DNS View tab, click the device to open the Device dialog box:
- Click FACTORY RESET. The Factory Reset Steps displays the result of the Device Factory Reset action on the Device dialog box (example shown below):
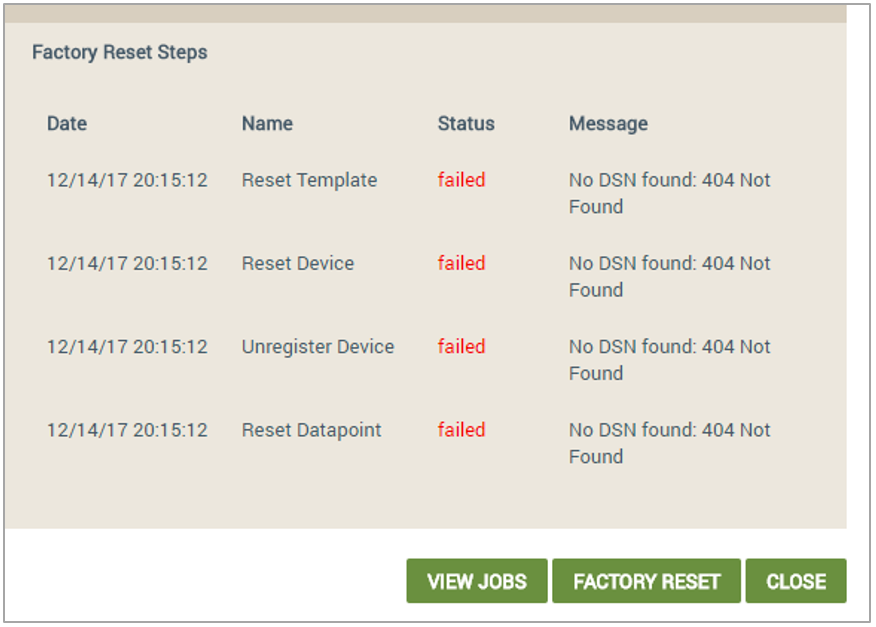
- Notice the four actions that take place for the Factory Reset function:
- Reset Template
- Reset Device
- Unregister Device
- Reset the Datapoint
- Click CLOSE when done.
See also: User Roles for Access to Factory Actions, Ayla Platform OEM Types
How to get here on the dashboard: Click Factory Actions in the Navigation Panel.
Please click here to let us know how we're doing. Thank you.